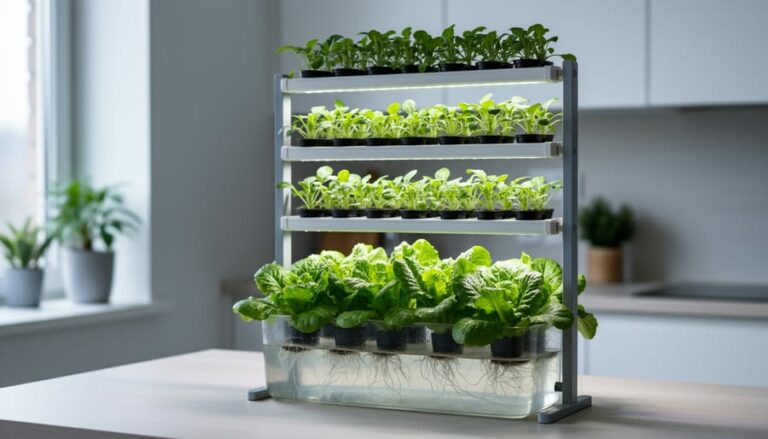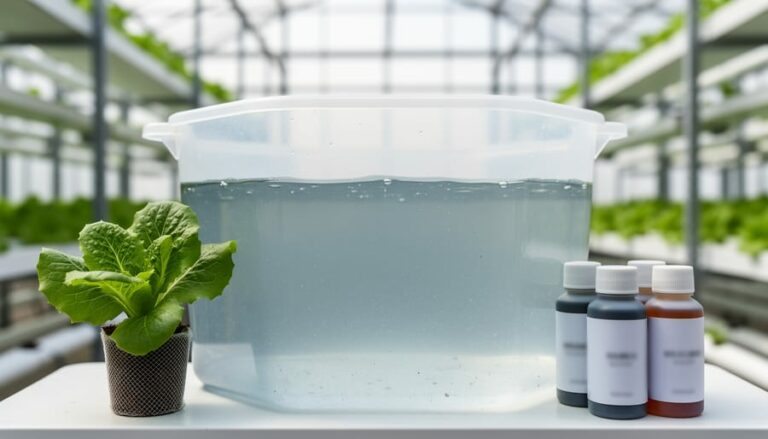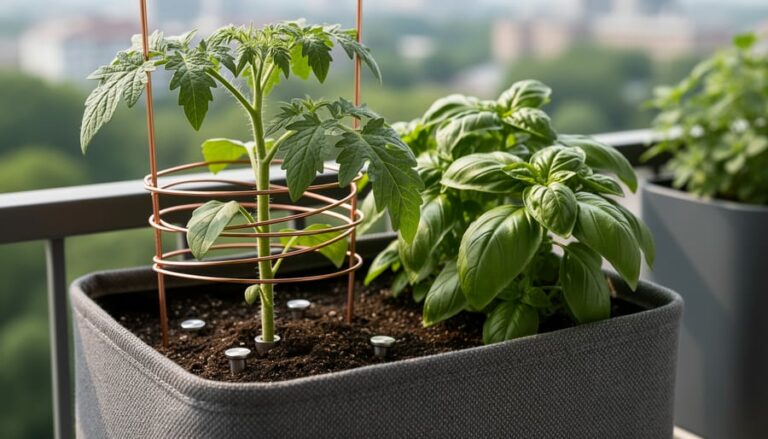
Hydroponic system maintenance is a weekly commitment to five core activities: monitoring nutrient concentration, balancing pH levels, inspecting water quality, checking equipment function, and examining plant health. Most growers spend 30 to 60 minutes per week on routine checks, with deep-cleaning tasks scheduled quarterly. This regular attention prevents nutrient lockout, equipment failure, and disease outbreaks that can destroy an entire crop in days.
The beauty of hydroponics lies in its precision, but that same precision demands consistency. Unlike soil gardens that buffer against fluctuations, hydroponic systems respond immediately to changes in water chemistry and equipment performance. A pH swing of just one point can halt nutrient uptake. A clogged pump can suffocate roots within hours. These aren’t flaws in the method, they’re simply the trade-off for faster growth and higher yields.
The maintenance framework detailed in this guide applies across all hydroponic methods, whether you’re running a deep water culture system in your apartment or a nutrient film technique setup in a community garden. You’ll learn to spot warning signs early, establish efficient routines that fit your schedule, and build the confidence to troubleshoot problems before they escalate. Regular maintenance isn’t just about keeping plants alive; it’s about creating the stable environment where they thrive, pushing growth rates that soil cultivation simply can’t match.
What You’ll Need: Essential Tools and Materials
Successful hydroponic maintenance starts with having the right tools ready before you need them. You don’t need to buy everything at once, but understanding what each tool does helps you prioritize your purchases and avoid scrambling when problems appear.
Monitoring Equipment: Your System’s Vital Signs
These tools let you measure what your plants can’t tell you directly. A digital pH meter is essential because nutrient uptake depends on maintaining the right acidity level, typically between 5.5 and 6.5 for most crops. Start with a reliable mid-range meter around $30-50 rather than the cheapest option, which often drifts out of calibration quickly.
An EC (electrical conductivity) or TDS (total dissolved solids) meter measures nutrient concentration in your solution. These terms measure the same thing differently, so pick one and learn its scale. Expect to spend $20-40 for a dependable meter. A simple aquarium thermometer completes your monitoring trio, since nutrient solution should stay between 65-72°F for optimal root health.
Budget-friendly tip: if you’re just starting with hydroponics for beginners pH test strips and a basic TDS meter will work initially, though you’ll want to upgrade to digital pH testing within a few months for consistency.
Cleaning and Maintenance Supplies
- Food-grade hydrogen peroxide (3% solution) for sanitizing reservoirs and preventing algae without harming plants
- Soft-bristle brushes in various sizes for scrubbing reservoir walls, tubing, and net pots without scratching surfaces
- Microfiber cloths for wiping down equipment and cleaning up spills without leaving residue
- Calibration solutions (pH 4.0, 7.0, and 10.0) for keeping meters accurate
- Small bucket or spray bottle dedicated to cleaning tasks, never used for nutrient mixing
Replacement Parts and Record-Keeping
Keep spare air stones, tubing sections, and pump filters on hand so equipment failures don’t turn into crop disasters. Advanced growers benefit from backup pumps and extra net pots. A simple notebook or smartphone app for tracking pH adjustments, nutrient changes, and plant observations becomes invaluable when troubleshooting issues weeks later.
Safety First: What to Watch Out For
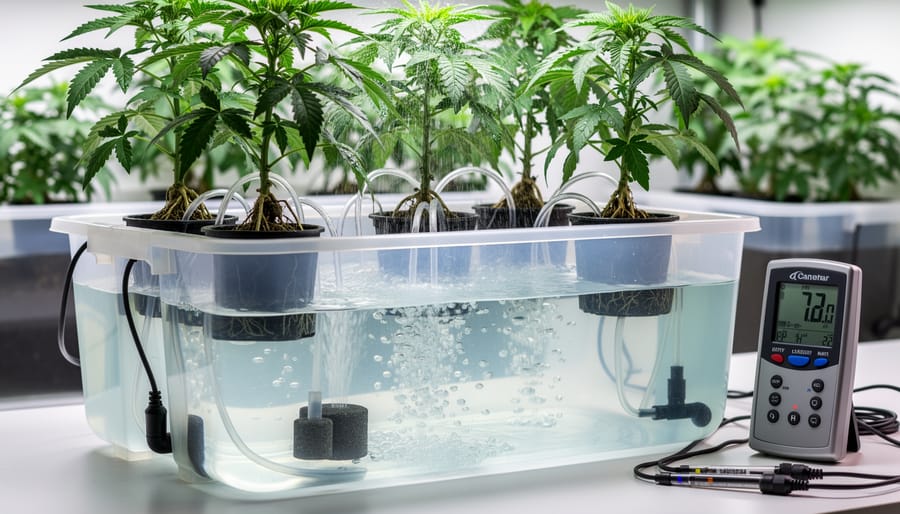
Before you dive into any maintenance work, understand the real risks. Hydroponics combines water, electricity, and chemicals in ways that demand respect and attention. A few minutes spent on safety prevents injuries, contaminated crops, and damaged equipment.
Electrical hazards pose the most immediate danger in hydroponic systems. Water and electricity create the perfect conditions for shock, and grow rooms often have moisture in the air, wet floors, and equipment running continuously. Before reaching into a reservoir or adjusting tubing, shut off power at the outlet or circuit breaker. Use a ground fault circuit interrupter (GFCI) outlet for all hydroponic equipment, it’ll cut power in milliseconds if it detects a short circuit. Keep extension cords and power strips elevated above potential water spills, and inspect all cords monthly for fraying or damage.
Concentrated nutrients and pH adjusters are corrosive chemicals that can burn skin and eyes. Wear gloves when handling them, and keep a bottle of clean water nearby to flush any splashes immediately. Store these products in clearly labeled containers, away from food and out of reach of children and pets. When mixing solutions, always add acid or base to water, never the reverse, to avoid violent reactions and splashing. Work in a ventilated area, especially when using hydrogen peroxide or other sanitizers that release fumes.
Cross-contamination between plants spreads diseases quickly in hydroponic systems where roots share the same water. Clean your hands and any tools before moving between plants or systems. If you spot root rot, powdery mildew, or pests on one plant, isolate it immediately and sanitize everything that touched it before returning to healthy plants. Don’t reuse water or nutrient solution from infected systems.
Disposing of old nutrient solution requires thought. High-salt solutions can harm soil and plants if poured directly onto garden beds. Dilute spent nutrients with at least ten parts water before disposing into a drain connected to a municipal sewer system, or use it to water non-edible ornamental plants in small quantities. Check local regulations, as some areas have specific rules for nutrient disposal.
Know when to stop and call for help. If a pump smells like burning plastic, sparks, or won’t start despite troubleshooting, replace it rather than forcing a repair. Cracked reservoirs, severely corroded fittings, or damaged UV sterilizers need replacement, not patches. Attempting DIY electrical repairs on grow lights or control systems without proper training creates fire and shock risks that aren’t worth any savings.
Daily and Weekly Maintenance Routines
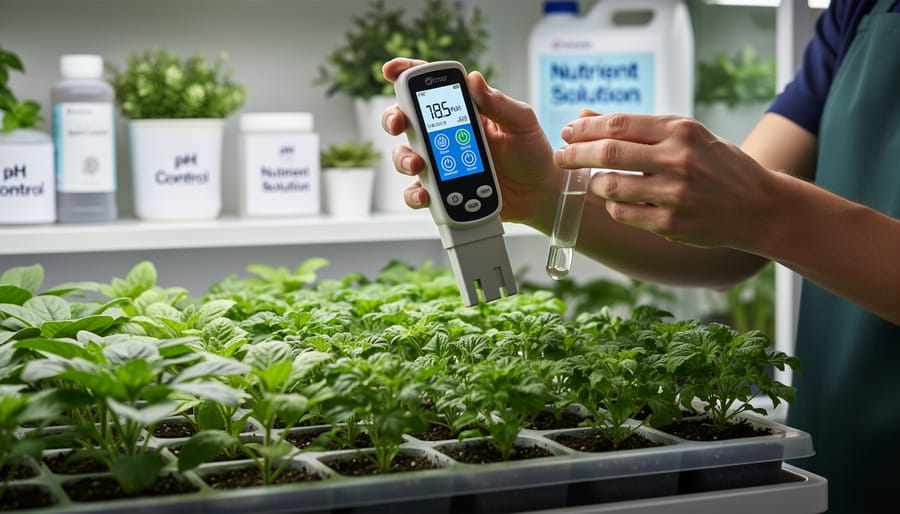
Daily Visual Inspections (5-10 Minutes)
Your daily visual inspection is the foundation of proactive maintenance. Spending just five to ten minutes each morning checking these four critical indicators can catch problems before they escalate into crop failures or equipment damage. Consistency matters more than depth here, you’re looking for changes from yesterday, not conducting a full system audit.
- Check water levels and top off with plain water. Look at your reservoir’s fill line or use a measuring stick to confirm the water level hasn’t dropped more than expected. Plants consume water faster than nutrients, so daily evaporation and transpiration are normal. Top off with pH-balanced plain water, not nutrient solution, to prevent concentration from creeping too high. If water levels drop dramatically overnight, you’ve got a leak or your plants are stressed.
- Observe plant health for wilting, discoloration, or pest signs. Scan your plants from top to bottom. Healthy leaves should be firm and vibrant. Look for drooping despite adequate water (root problems), yellowing between veins (nutrient issues), brown crispy edges (salt burn or heat stress), or tiny dots and webbing (spider mites). Check undersides of leaves where pests hide. New growth should be lighter green but not pale yellow.
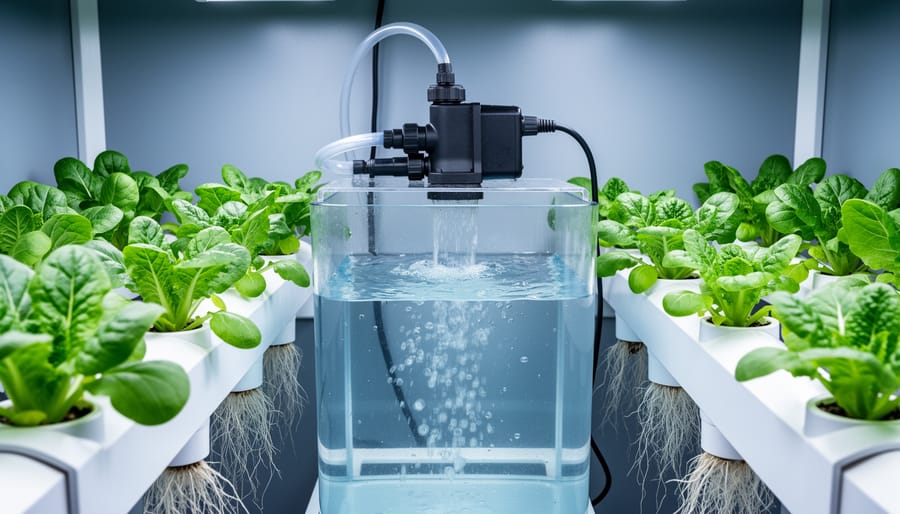
- Verify pumps, air stones, and timers are functioning. Listen for your pump’s hum and watch for water movement in your lines. Air stones should produce steady streams of fine bubbles, large, irregular bubbles mean the stone is clogging. Confirm your timer clicked on and off as scheduled. A silent pump or stagnant water means roots aren’t getting oxygen, and you have hours, not days, before damage occurs.
- Monitor reservoir temperature. Stick a thermometer in your reservoir and confirm it reads between 65°F and 72°F. Warmer water holds less dissolved oxygen and encourages root rot pathogens. Colder water slows nutrient uptake. If temperature has shifted more than 5 degrees from yesterday, investigate your grow room’s climate control.
Record these observations in a simple notebook or phone app. Jot down the date, water level change, any plant symptoms, equipment status, and temperature. This log becomes invaluable when troubleshooting, patterns emerge that you’d miss relying on memory alone. A quick photo of your plants each week provides visual proof of growth progress or emerging problems.
Weekly Deep Checks and Adjustments
Once a week, set aside 30 to 45 minutes for deeper system checks that daily walk-throughs can’t catch. These tasks directly impact nutrient uptake, root health, and long-term productivity.
Step 5: Test and Adjust pH Levels
Start by testing your reservoir’s pH with a calibrated meter. Most leafy greens and herbs thrive between 5.5 and 6.0, while fruiting crops like tomatoes and peppers prefer 5.8 to 6.3. If your reading falls outside the target range, add pH up or pH down solution in small increments, a few milliliters at a time, then wait 15 minutes and retest. pH drift happens naturally as plants consume nutrients at different rates, and uncorrected swings lock out essential elements even when they’re present in the solution. Record your readings to spot patterns; if pH consistently drops or rises within days, you may need to adjust your nutrient formula or examine root health.
Step 6: Measure EC/TDS and Adjust Nutrient Concentration
Next, check electrical conductivity (EC) or total dissolved solids (TDS) to gauge nutrient strength. Seedlings and young plants need lower concentrations, around 0.8 to 1.2 EC (400 to 600 ppm), while mature, flowering plants can handle 1.6 to 2.4 EC (800 to 1,200 ppm). If the reading is too high, dilute with fresh water. If it’s too low, add a measured amount of your nutrient solution. Consistent readings tell you plants are feeding at the right pace; unexpected spikes or drops signal overfeeding, underfeeding, or water loss from evaporation. Choosing high-quality organic nutrients can simplify this process, since they often release elements more predictably than cheaper synthetic blends.
Step 7: Clean Visible Algae from Reservoir Walls and Tubing
Wipe down any algae growth on reservoir interiors and exposed tubing with a soft cloth or sponge. Algae compete for nutrients, cloud the water, and can harbor pathogens. If growth is heavy, drain a few inches of solution, scrub with a dilute hydrogen peroxide solution (1 part 3% peroxide to 10 parts water), then rinse thoroughly. Preventing algae starts with blocking light from the reservoir, use opaque containers and cover any gaps.
Step 8: Inspect Roots for Health and Trim Dead Material
Lift a net pot or access panel to examine roots. Healthy roots are white or light tan, firm, and smell faintly earthy. Brown, slimy, or foul-smelling roots indicate rot, often from poor oxygenation or high temperatures. Trim away dead or diseased sections with sterilized scissors, cutting back to healthy tissue. Removing dead roots prevents decay from spreading and frees the plant to focus energy on new growth.
Step 9: Clean or Replace Air Stones and Check Air Pump Output
Finally, inspect air stones for mineral buildup or clogging. Soak them in white vinegar for 15 minutes, scrub gently, then rinse. If bubbles remain weak or uneven after cleaning, replace the stone, they’re inexpensive and vital for root oxygenation. Check the air pump’s tubing for kinks and listen for consistent output; reduced airflow stresses roots and invites disease. This simple step prevents oxygen-related problems before they damage your crop.
Monthly and Seasonal Deep Maintenance
Complete Reservoir Changes and System Flushes
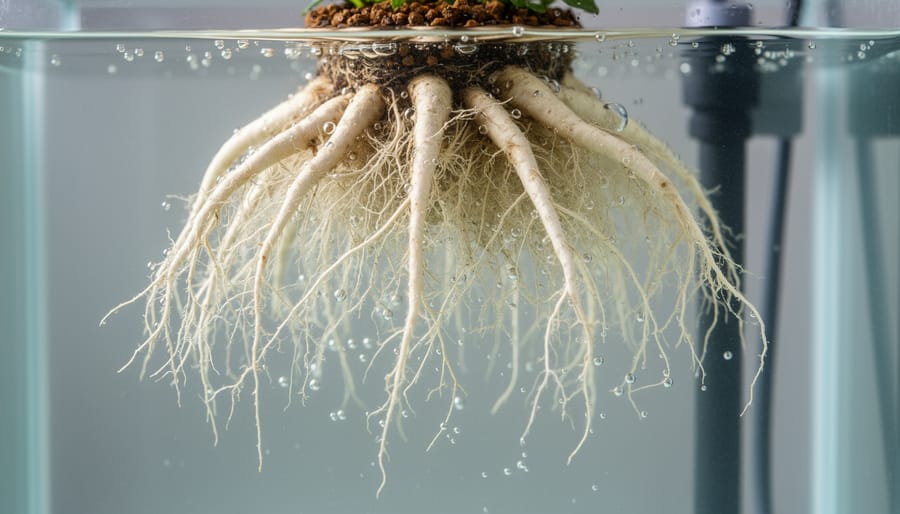
Step 10 starts with knowing when your nutrient solution has outlived its usefulness. Most growers should fully replace their reservoir every two to four weeks, though the exact timing depends on plant stage, crop type, and system size. Young seedlings consume nutrients slowly and can stretch to four weeks between changes, while fruiting plants in peak production may deplete solutions in two weeks or less. Your EC readings tell the story: if you’re constantly adjusting concentrations or pH swings wildly between checks, the solution has accumulated too many unused salts and needs replacement.
Step 11 requires complete draining before you clean. Turn off all pumps, disconnect power to prevent accidental startup, and use a submersible pump or siphon to remove old solution from the reservoir. For DWC systems, lift net pots carefully to access the container, supporting plant roots as you work. Drain NFT channels by tilting them slightly or opening drain ports at the low end. Once empty, scrub reservoir walls with a soft brush and clean water to remove biofilm and mineral deposits. Pay attention to corners and the waterline where algae colonize most aggressively. Rinse thoroughly until no residue remains.
Step 12 addresses the hidden problem that degrades system performance over time. Salt buildup inside tubing, emitters, and drip lines restricts flow and creates hot spots where nutrients crystallize. Flush these components by running plain water through the entire system for 15-20 minutes before refilling with fresh nutrients. For drip systems, remove and inspect individual emitters, soaking clogged ones in a vinegar solution overnight to dissolve mineral scale. NFT systems benefit from flushing the return line and pump separately to clear accumulated sediment.
Step 13 completes the deep clean with sanitization between crop cycles. Hydrogen peroxide sanitization at a 3% concentration effectively kills pathogens without leaving harmful residues. Fill the reservoir with water, add one cup of 3% hydrogen peroxide per gallon, circulate through all lines for 30 minutes, then drain completely and rinse twice with plain water. This prevents disease carryover between plantings and gives you a truly fresh start for the next crop cycle.
Equipment Calibration and Replacement
Step 14 brings you to meter calibration, a task many growers skip until readings drift wildly off. Every two to four weeks, calibrate your pH meter using buffer solutions at 4.0, 7.0, and 10.0. Rinse the probe with distilled water between buffers, gently shake off excess, and follow your meter’s calibration sequence. EC meters need less frequent attention, typically monthly, using a standard solution matched to your typical growing range. Drift happens faster with cheaper probes, so if you’re using budget equipment, check weekly until you understand its stability pattern. Store pH probes in storage solution, not tap water, which shortens electrode life.
Step 15 focuses on pumps, the heart of your system. Once a month, disconnect power and inspect the impeller housing for buildup. Unscrew the pump cover, remove the impeller, and clean both the blades and the magnetic shaft with a soft brush and white vinegar to dissolve mineral deposits. Check for cracks, worn rubber seals, or loose fittings that reduce flow. Submersible pumps should spin freely when you rotate the impeller by hand. If you hear grinding or notice reduced flow despite cleaning, the bearings may be failing and replacement is smarter than repair.
Step 16 covers leak prevention through connection checks. Examine every joint, elbow, and barbed fitting for moisture, salt crust, or discoloration. Tighten hose clamps, replace brittle tubing, and reseat fittings that show gaps. Small drips compound into reservoir loss and humidity problems, so address them early.
Step 17 sets replacement schedules for consumables. Air stones clog and lose output after two to three months. Tubing becomes stiff and prone to cracking after six months of UV and nutrient exposure. Filters need swapping based on flow rate reduction, not a fixed calendar. Stock spares so you’re not scrambling mid-cycle.
Step 18 addresses lighting. Use a PAR meter or phone app to verify LED output at canopy level every season. Diodes degrade gradually, typically losing 20 percent intensity after three years. Adjust hanging height or add supplemental panels if readings drop below your crop’s requirements, which vary from 200-400 µmol/m²/s for leafy greens to 600-900 for fruiting plants.
Verifying Your System Is Running Optimally
After completing your maintenance tasks, you need concrete evidence that your system is functioning at peak performance. Start by examining your plants closely: healthy growth shows as new leaves unfurling every few days, vibrant green coloration without yellowing or brown spots, and stems that stand firm rather than droop or appear spindly. If you notice slower growth or color changes despite maintenance, revisit how you choose nutrients and check whether concentrations match your crop’s growth stage.
System metrics provide objective confirmation. Your pH should remain stable for at least three days after adjustment, typically drifting less than 0.3 points between checks. EC or TDS readings should stay consistent until plants consume nutrients, and reservoir water should appear clear with no cloudiness, film, or odor. Murky water signals bacterial growth or algae despite cleaning efforts.
Test equipment function by measuring actual performance against specifications. Check pump flow rates by timing how long it takes to fill a measured container; reduced flow indicates clogs or failing motors. Temperature should hold steady within two degrees of your target throughout the day. Verify timers are triggering on schedule by observing them through a complete cycle.
Your system is performing well when you see:
- Plants adding new growth every 2-3 days with strong, upright stems
- Leaf color remains consistent without spots, yellowing, or purple edges
- pH holds stable for 3+ days between adjustments
- Reservoir water stays crystal clear with no smell
- Root systems appear white or cream-colored, not brown or slimy
- Equipment runs quietly without unusual vibrations or heat
When verification reveals problems, address them immediately. Stunted growth with pale leaves usually means nitrogen deficiency or insufficient light intensity. Brown, slimy roots indicate root rot; increase dissolved oxygen and reduce water temperature below 70°F. Rapid pH swings suggest bacterial imbalances; perform a full system flush and reduce organic matter in the reservoir. Inconsistent equipment performance means parts need replacement before they fail completely and crash your system.
Next Steps: Building Your Maintenance Schedule
Now that you’ve learned the maintenance fundamentals, translate them into a working schedule you’ll actually follow. Start with your system’s baseline needs: small single-plant setups might need 15 minutes daily and an hour weekly, while multi-zone commercial systems demand structured shifts. Map your tasks to a calendar app with reminders, grouping daily checks before breakfast, weekly adjustments on Sunday mornings, and monthly deep cleans on the first of each month.
Your crop choices shape the intensity. Fast-growing leafy greens like lettuce tolerate wider parameter ranges and forgive missed pH checks better than finicky fruiting plants like tomatoes or strawberries, which demand tighter monitoring windows. Track which crops you’re running and adjust check frequency accordingly.
Smart controllers eliminate much of the manual burden. Modern AI-driven systems continuously monitor pH, EC, temperature, and water levels, automatically dosing nutrients and adjusting conditions while texting you alerts when intervention is needed. These tools don’t replace your oversight, but they compress your active maintenance time from hours to minutes and catch problems before they escalate.
Don’t maintain in isolation. Community growing networks provide troubleshooting support, seasonal tips, and accountability. Jason’s Hydroponic Garden offers regional workshops, online forums, and mentor matching that transform maintenance from a solitary chore into shared learning.
Your diligent upkeep directly advances urban food security. Every harvest from your well-maintained system proves hydroponic agriculture’s potential to feed cities sustainably, reduce food miles, and democratize fresh produce access. Schedule your maintenance, then grow something extraordinary.
Common Maintenance Questions Answered
Growers who start without soil quickly discover that maintenance questions pile up faster than their first tomato crop. These answers cut through the confusion with field-tested guidance that applies to real-world growing conditions.
How often should I change nutrients in different system types?
Deep water culture systems need fresh nutrients every 2-3 weeks, while NFT and drip systems can often run 3-4 weeks between full changes. Smaller reservoirs under 10 gallons require more frequent changes because nutrient concentrations shift faster.
Can you actually over-maintain a hydroponic system?
Yes, constant pH adjustments and excessive reservoir changes stress plants by preventing them from settling into stable nutrient uptake patterns. Stick to your schedule unless measurements fall outside target ranges.
What maintenance tasks can be automated?
pH controllers, auto-dosing nutrient pumps, and water level sensors handle daily adjustments reliably. Temperature monitoring and automated top-off systems eliminate the most time-consuming checks, though you still need weekly hands-on inspections.
How do I maintain my system during vacation?
Fill reservoirs to maximum capacity, install an auto-top-off float valve, and ask someone to check the system every 3-4 days. For trips longer than two weeks, automated pH and nutrient dosing becomes essential rather than optional.
Nutrient lockout and deficiency present similar symptoms but require opposite fixes. Lockout shows multiple deficiency signs simultaneously despite high EC readings, and pH sits persistently outside the 5.5-6.5 range. Actual deficiency appears gradually with normal pH and shows specific patterns like yellowing lower leaves for nitrogen or purple stems for phosphorus. When in doubt, check pH first since it causes lockout 80 percent of the time.
The repair-versus-replace decision comes down to cost and reliability. Replace pumps after two years or when output drops below 70 percent of rated capacity, even if they still run. Reservoirs with cracks, air stones that stay clogged after cleaning, and timers that miss cycles need immediate replacement. Clean and reuse tubing, net pots, and growing media unless you’re dealing with root disease. For expensive components like controllers or dosing systems, repair makes sense if parts cost less than half the replacement price and the unit is under three years old.